FREQUENTLY ASKED QUESTIONS
We have tried our best to make sections for relevant questions and answers… just scroll down until you see the section you need.
PRODUCT INFORMATION
Support
One of the best place to get help is Discord: DISCORD
There’s also Reddit: REDDIT
There are a lot of knowledgeable people in those groups. By posting your issue in one or more of those places we have a much better chance of finding the answer. But be warned… ANY changes made to a ready to run controller other than what is allowed will void the warranty of the controller. We will still help but the controllers are pre configured and the settings in them should not be changed other than the amount of lights per output and the Protocol of each output if needed.
All the documentation for WLED is also online: https://kno.wled.ge
And the QuinLED (digQuad) boards are all documented at https://quinled.info
There a few videos by DRZZs on youtube for installing PermaTrack. Here is the latest one. https://www.youtube.com/watch?v=sInCwyewqTM
12V and 24V WS2811 Square Pixels 12 mm / The pixels we sell are CE and RoHS certified
30mm Puck Lights (ucs2904 Chip Set) RGBW 12V and 24V / The pixels we sell are CE and RoHS certified
We will send a box filled with 5 lengths of PermaTrack for roughly 19’.
Click the link below:
PermaTrack ~ 19′ Pack $99.95
- This box contains five lengths of PermaTrack, and this is the smallest grouping that we are offering with free shipping for this box of 5 PermaTrack.
- Each box comes with 15 mounting brackets.
Even though we have our ready to run controllers set to 600 lights an output the Dig-Quad (If purchased separately the default is 30 Lights and the color orange. If you see this try changing the number of LEDs in the LED Preferences for each output.
If you Bought the Ready to run controller each output is already set to set to 600 Lights per output.
Yes… there is a post for power ground and neutral
Yes. Unlike traditional lights these RGB pixels are all individual and you can trim them.
No, The power supply itself is really a converter taking 120V down to the Voltage you need for your pixels . As long as the out voltage matches what the LEDs are expecting you are good to go. (12v power supply for 12v LEDs, or 5v power supply for 5v LEDs and 24v Power supply for 24v)
M2.5 is the magic size of screws to mount the dig quad controller to an Mounting board.
Be careful when connecting new strings of LEDs. Some have small bits of exposed wire and if those wires touch it causes a short and will blow the fuse. Also, don’t ever cut LED strips or string wires while the LEDs are connected to the controller. The scissors or cutters can also cause a short that can blow the fuse or damage the LEDs.
….If you think you have blown a fuse. Try connecting the power output to the 3rd terminal (which corresponds to the 2nd fuse) or replace the first fuse with one of the others and see if that works.
Make sure you have a DC power supply so you don’t blow the DigiQuad – you CANNOT use a transformer providing AC power.
We did a 2 month test on both 12V and 24 Volt
SET UP
Power supply : Meanwell 24V / 600 W / 24 amp
Pixels 24V Native Square Pixels (I am using squares but the Bullets are the same)
POWER DRAW
100% Brightness .25W / .015 Amps Max Lights at 100% Brightness 1600 pixels – 15% = 1360 Pixels
50% brightness 3,300 Pixels – 15% = 2800
REAL LIFE TEST
I had 1895 Pixels running at full brightness for 24 hours a day for 3 weeks. Power supply was warm with controller lid closed and a vent with a fan
The reason you can do more than you can with 12V is because of Ohm’s law which basically states this.
Double the volts = cutting the amps in half . Add to that 250 more watts give you a lot more lights on a single power supply than is a 12V 350W Powers supply.
Think about this. One of my Falcon controllers that has the expansion board and four 30 amp power supplies in it can only do 6400 lights at 50% brightness while keeping the 15% max use rule.
With four 600 Watt 24V power supplies you can do 12,000 lights while only drawing 20 Amps through the controller boards
What it comes down to is a little higher cost (Around $80 for the above mentioned controller non for the lights) You can now do the same amount of lights you do now with half the controllers
Absolutely! The controller is still the Dig-Quad and is is recognized by xLights and Light O Rama as a controller. The signals to the lights is exactly the same also. The only Difference? Being able to run more lights!
There isn’t an exact number of pixels before you need voltage injection. There are too many variables involved to make an absolute rule.
Our General Rule is Power Injection Every 299 (for 12V Lights and 500 Lights for 24V) but brightness, distance from the power supply, and which effect is selected are important factors. If you run at 100% Brightness (This is NOT recommended and covered under the warrenty) You should power inject every 161 lights for 12V and 500 lights for 24V and you might need another power supply if you have over 1500 12V lights and 2400 24V lights
A decent rule of thumb is this: if there are more than 299 12v pixels in a line or 500 24V pixels in a line, plan to run a pair of 18 or 16g wires along with the pixels and Use a Power T or tie them into the +/- wires about half way through the run. That might not always be necessary but it doesn’t hurt anything to have extra and it’s easier to do at the beginning than try to add it later.
Each Pixel Pack String has power injection wires (The newer ones have a pigtails) at one end to make power injection easier as well as Power T’s that plug in to the end of a string.
This can be a result of low power and you need to power inject or the Data is to weak because of a long distance between pixels or your first pixel is to far from the controller. Also if you have to many pixels on an output it can affect performance (We recommend that you do not go over 800 pixels per output
Things to check
- Make sure that you only have 600 Pixels connected to an output.
- If you have a jump from one pixel to another of over 6 feet use a Data Extender in the middle of the wire in between the pixels. this should be repeated for every 6 feet you have to jump. SO if you have a 12 foot gap you would need to use 2 Data boosters and 3 if you have an 18 foot jump.
- Make sure that the Automatic Limit option is unchecked!

- Make sure you have power injection a minimum of every 299 lights (One box of track)… (Every 100 Pucks)
Output 1 GPIO 16 / Output 2 GPIO 3 / Output 3 GPIO 1 / Output 4 GPIO 4
Prerequisites
A computer with a modern web browser (Google Chrome, Edge, or Opera are recommended, Safari will not work).
A USB-C data cable (power-only cables will not work).
The required USB-to-Serial driver for your operating system (most computers will have this automatically, but if not, you may need to install the CH340 driver or CP210x driver). You will know if you need these drivers If you can’t
Step-by-Step Instructions
While this guide does not include pictures, the process is streamlined and generally straightforward.
Disconnect Power: Unplug the controller from the outlet
Disconnect the Antenna from the ESP32: The wire from the Antenna connects on the top of the ESP32
Remove the ESP32 Module: Gently and Carefully unplug the smaller QuinLED-ESP32 control board from its socket on the base board of the Dig-Quad.
Connect to Computer: Plug the removed QuinLED-ESP32 module into your computer’s USB port using a USB-C cable. Power only cables will not work
Open the Web Flasher: Open your compatible web browser and navigate to the custom QuinLED installation page at https://install.quinled.info/dig-quad/.
Select the button that says Antenna Board: and select the option that says EXTERNAL ANTENNA.
Initiate Installation: Click the “Install” button on the webpage. A pop-up window will appear asking you to select the correct USB Serial (COMx) port.
Select Port and Install:Select the port that corresponds to your connected device (it might be labeled COMx on Windows or similar).
Click “Connect”, and then “Install” in the next prompt to confirm the firmware installation.
Troubleshooting: If no device is found, ensure the drivers are installed and / or try a different USB port or cable. The required USB-to-Serial driver for your operating system (most computers will have this automatically, but if not, you may need to install the CH340 driver or CP210x driver).
Wait for Completion: The flashing process will begin and should take just a few minutes. A progress bar or log messages will indicate the status.
Reconnect Hardware: Once the installation is successful, disconnect the ESP32 module from your computer’s USB cable and Gently but firmly plug it back into the main Dig-Quad board, ensuring correct orientation (USB port toward the fuse).
Initial Setup:Re-Plug in your controller to an outlet
The Dig-Quad will create its own Wi-Fi access point named WLED-AP.
Connect to this network on your phone or computer using the password wled1234.
Open a web browser and navigate to 4.3.2.1 to access the WLED interface and configure your home Wi-Fi network and LED preferences.
Follow the instructions found HERE to load the Config File and Presets file to get your controller back to it’s original state.
The instructions for restoring the original setting are below
In WLED select the Settings Option
2. Then Select the Security and Updates option
3. Go to the Backup and restore section
DOWNLOAD THE LATEST BACKUP FILES HERE
4. Below were it says RESTORE PRESETS Select CHOOSE FILE and add the file called PRESETS_wled__Dig-Quad-V3
5. Then select upload
6. Then select CHOOSE FILE under the RESTORE CONFIGURATION and add the file called CONFIG_FILE_wled_cfg_Dig-Quad-V3
7. Then select upload
8. Select Save at the Top of the page.
Your settings should be back to the original settings.
Sometimes we have different kinds in stock. The ones we try to use normally you do not have to strip the wires away from each other and they look like this 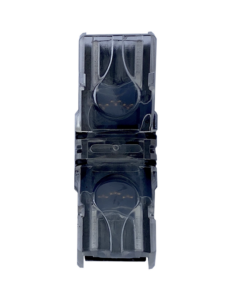 This only works with the flat three wires. (DO NOT STRIP THE CASING) If you look at it in through the ends you will see that you slide all three wires (unstripped) in.
The will look something like this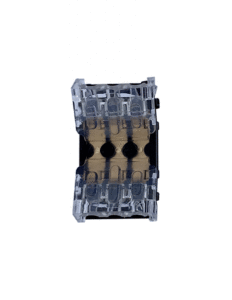 These you have to strip the wire away from each other (DO NOT STRIP THE CASING) and you will see that you put in each wire separately and you need to make sure they are ALL the way in (it ill look like they are just above the middle) and then you can close the side.
I AM USING THESE AND THEY DO NOT WORK
1. you have to make sure they are aligned correctly (Blue does go to ground which is the black with the grey dashes on it
2. you need to make sure you press them all the way in. the wires will almost be all the way to the center
3. You need to make sure they are all the way closed. I press them down on the wire until it clicks and then I press them again rather strongly to make sure the contacts have penetrated the outer covering and are touching the wire.
NEITHER OF THESE CONNECTORS WORK WITH OUR ROUND WIRE THE WIRE AND CASING ARE TO THICK
Absolutely! The controller is still the Dig-Quad and is is recognized by xLights and Light O Rama as a controller. The signals to the lights is exactly the same also. The only Difference? Being able to run more lights!
The Short answer is NO. Although the dig-quad has the ability to put a microphone into it to have effects play based on sound our controller is not set up for that.
You can use the Program xLights or Light O Rama and create sequences where you can add music and then put effects with that music then out put it to the controller. Both of these software programs see WLED as a controller and can control them.
You will also need a 1/8 inch mini jack cord to go to a FM transmitter or receiver, if you are only outputting to speakers, and connect them to the player (Computer or RaseberryPi with mini Jack output) Then you have total control of your music and effects
SHIPPING
MISC
We are in Lehi, Utah
Yes, bulk discounts start at 50 Boxes but gets better at 100 or more
PermaTrack in 4 color options made of aluminum Black / Dark Brown / Light Brown / White
The pixel track has the option of holes that will point down or holes that point the lights towards the road or House
Pixels (Lights) (WS2811 12V & 24V)
Track for Puck Lights (White only) made of Aluminum with 30mm Puck Lights (ucs2904 Chip Set) RGBW 12V
Ready to run Controller Box (Which has the software already on it)
Power supplies
Wire
Click-Its
Data extenders.
We do not have
Endcaps (SFL-Designs.com has them and many other accessories)
You can find end caps here https://sfl-designs.com/?store-page=search&keyword=permatrack
Sometimes the mods that the factory uses for the pixels are not exact. Sometimes they can be a bit loose in the hole. Use a bit of hot glue and they will stay in the holes just fine. Sometimes they can be a bit large so it seems they are harder to get into the holes. Just wear padded gloves and use the back side of a screwdriver. Just need something blunt and easy to hold onto.
Also is is a good idea to loop the Pixel wire between holes: